How to turn a Vintage Zenith Radio Cabinet into a Lighted Bar
Radio Bar
This is a project that has been a loooong time coming. My plan is to walk you through all the steps we took to restore, refinish, and alter the Zenith radio cabinet we found at an estate sale into the final item that is currently sitting in my library.
The Find
In 2015, my wife found a Zenith radio cabinet at an estate sale. I drove over to the old house, occupied by the same local family for years, to take a look at it. The radio was in pretty rough shape. It looked like it had gotten wet at some point, the tuning knob was missing, and it had all the usual wear and tear of 70 years.
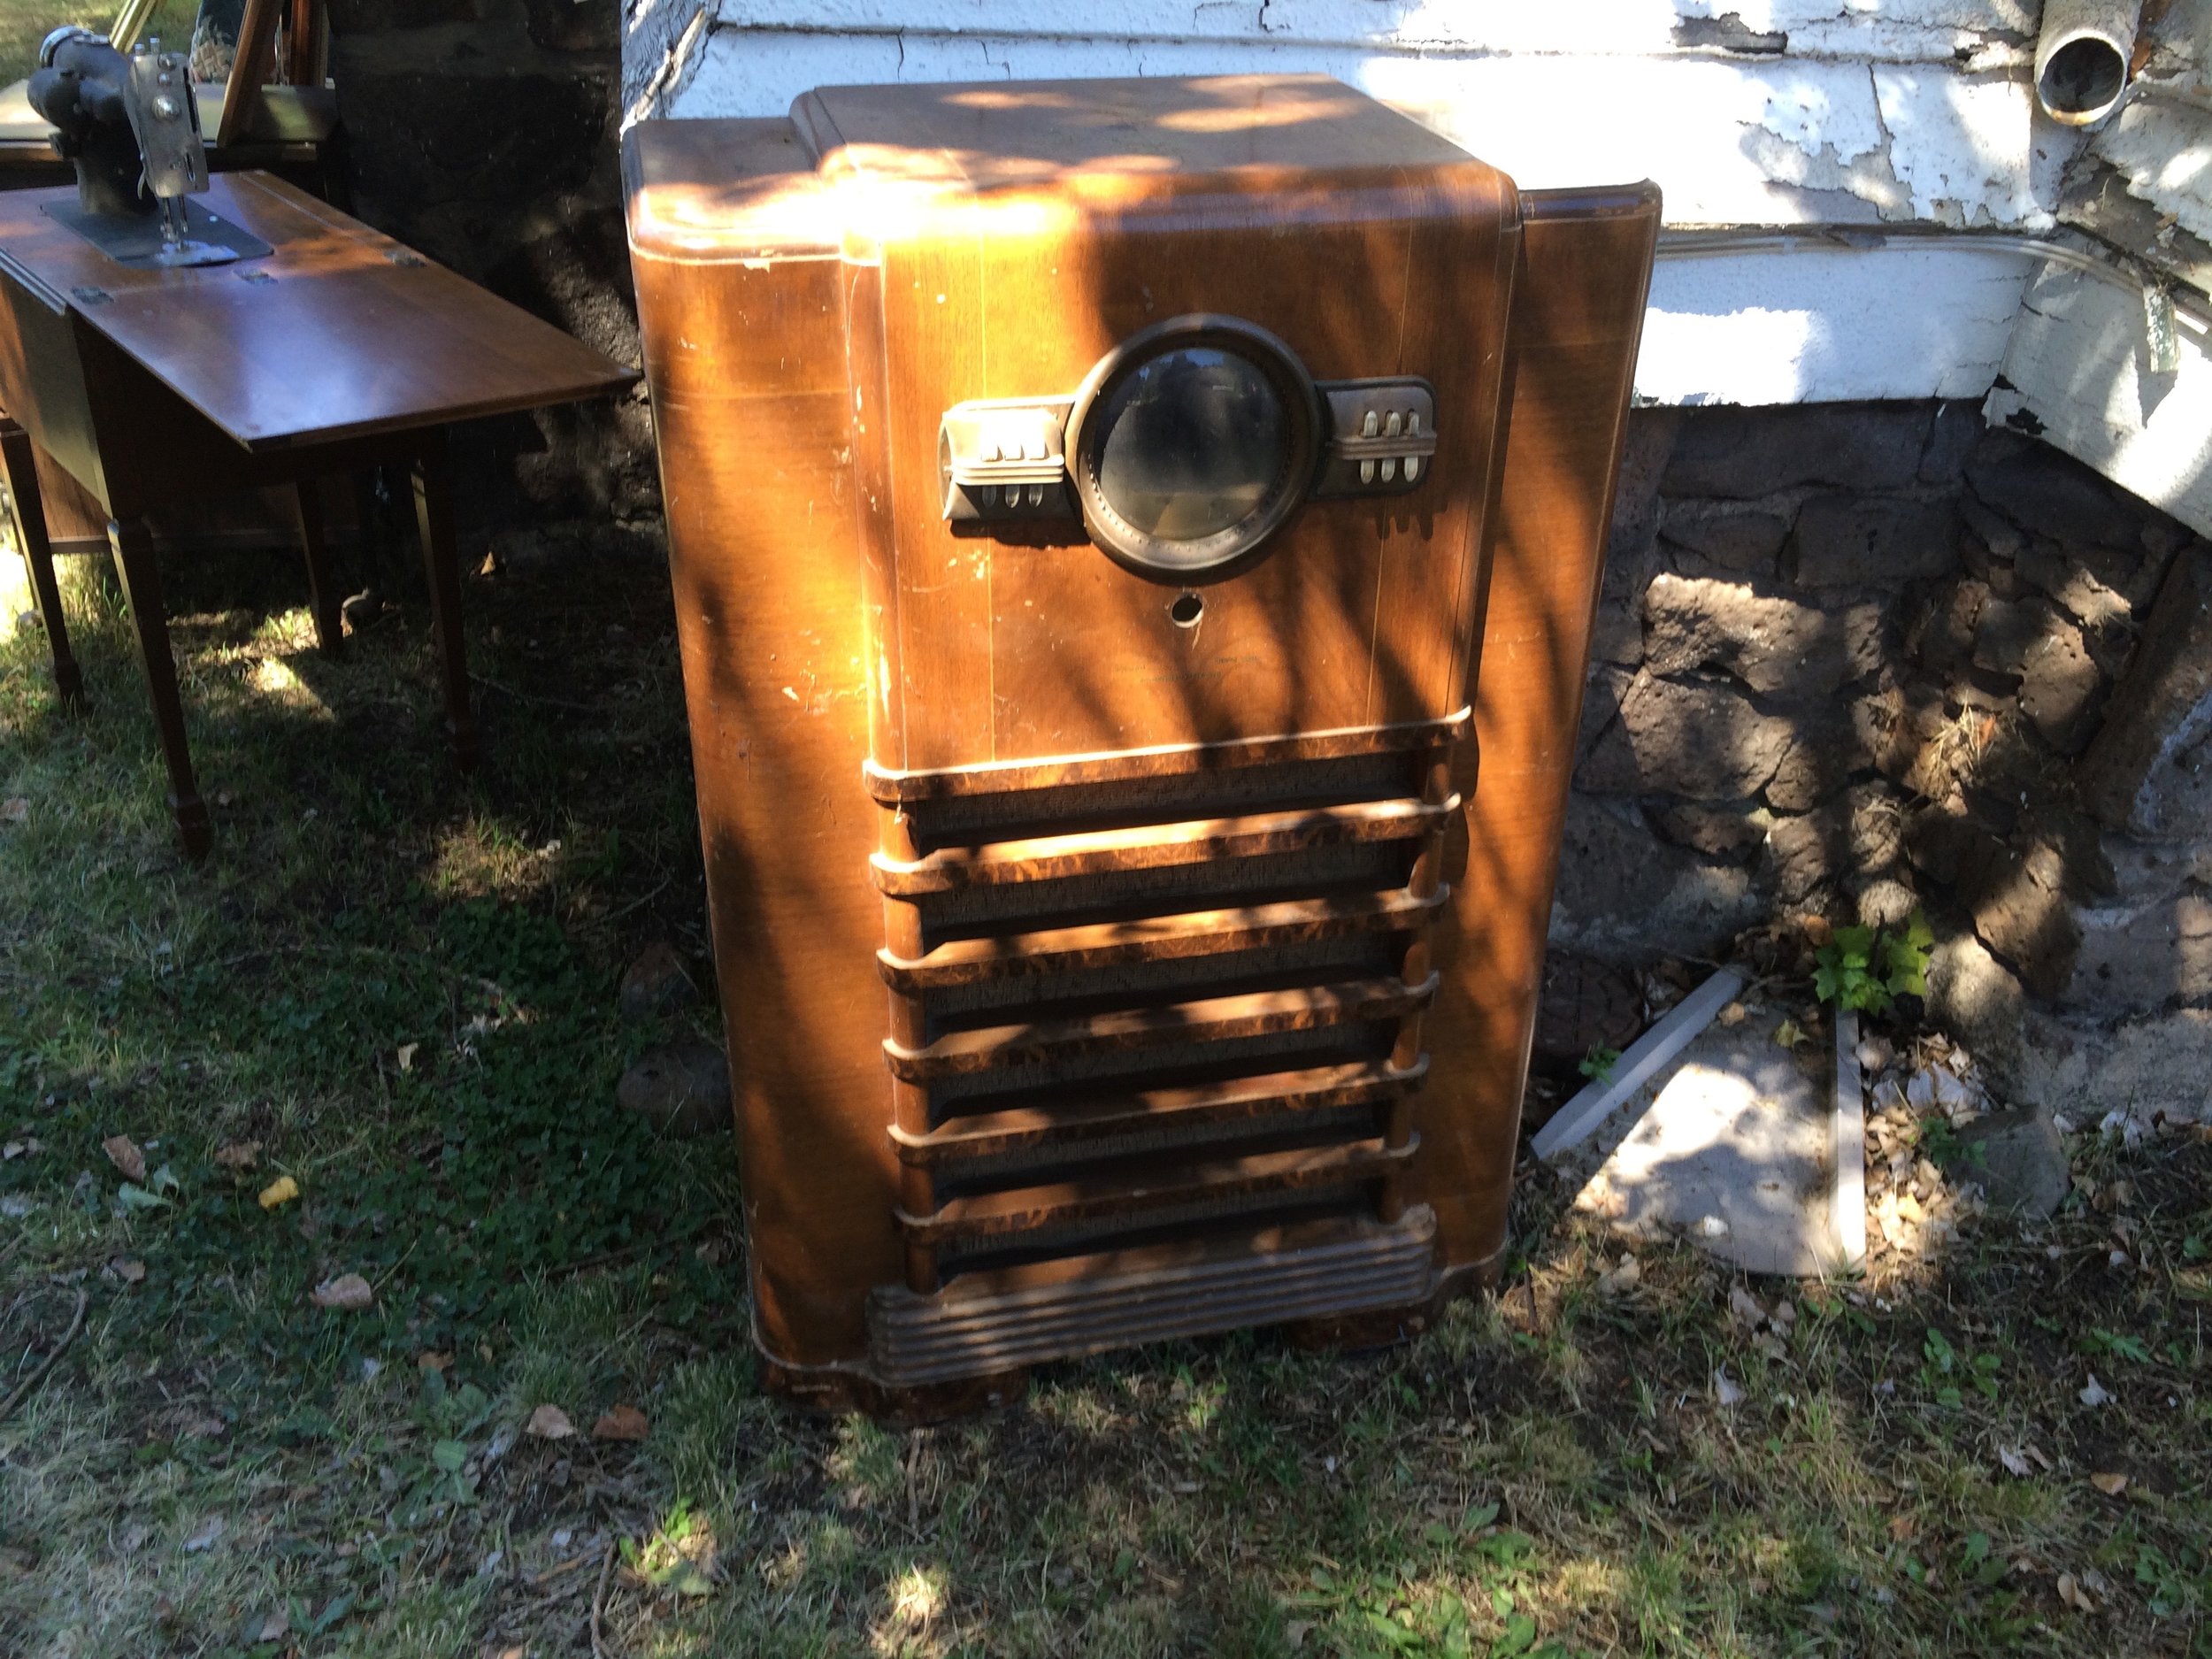
My first view of the radio
However, it seemed like we would be able to refinish it. We wanted to turn it into a bar cabinet, based on some things my wife had seen on Pinterest [dangerous!].
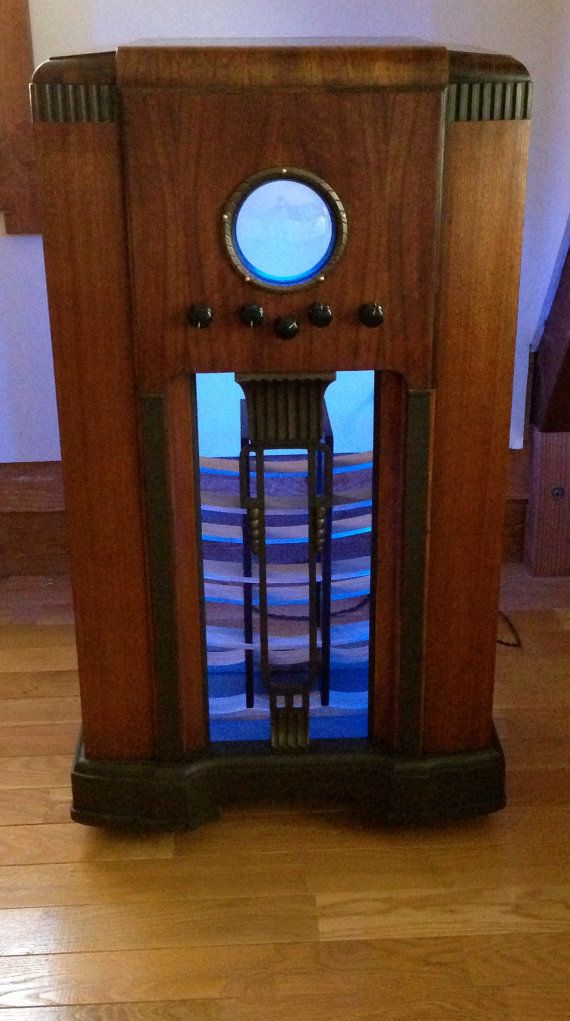
Pinterest example #1
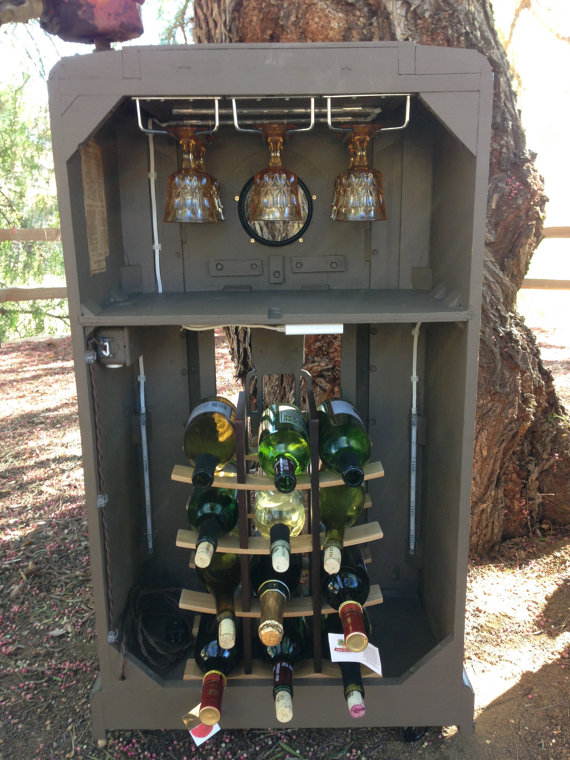
Pinterest example #2
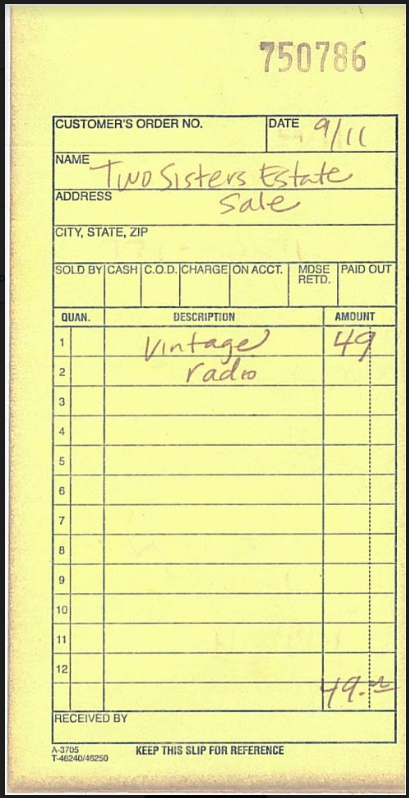
This seemed like a fun project, so I bought the cabinet for $49 [I offered $50, but I found out I was a buck short when I went to settle up.]
I brought the radio home, but unfortunately I didn't secure it well, and it fell over in the back of my RAV4, and I broke the glass.
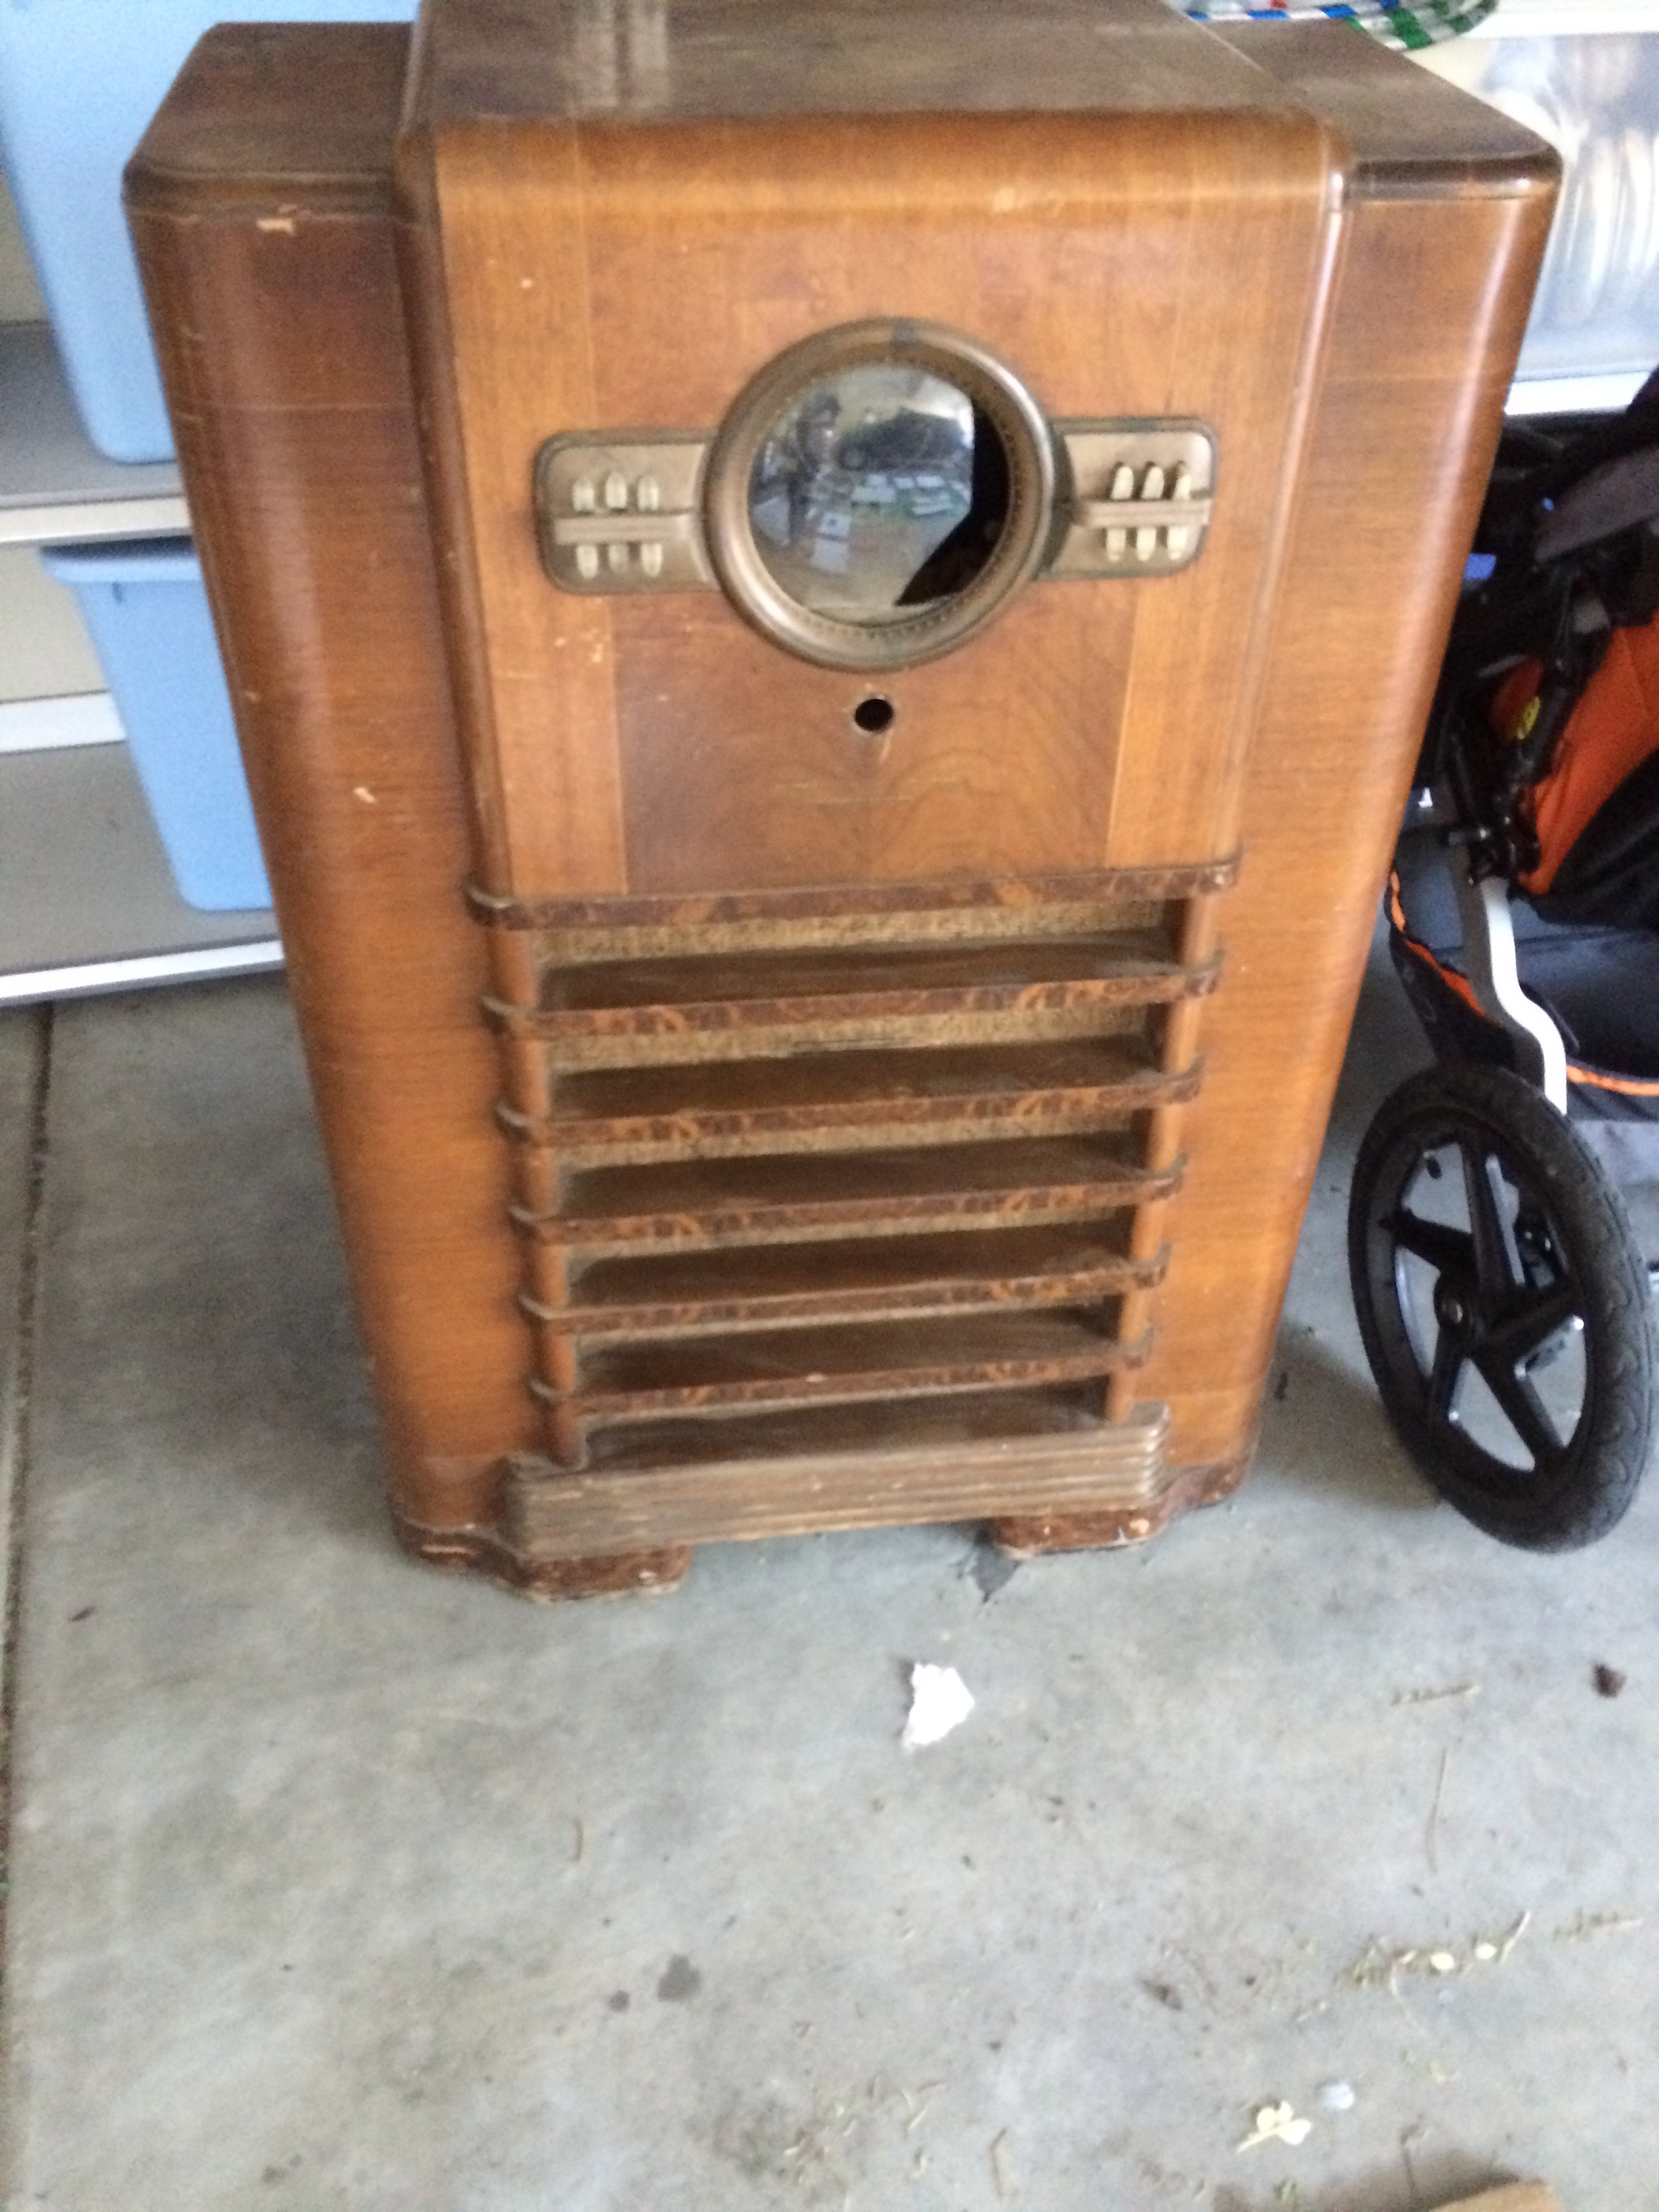
Oops....
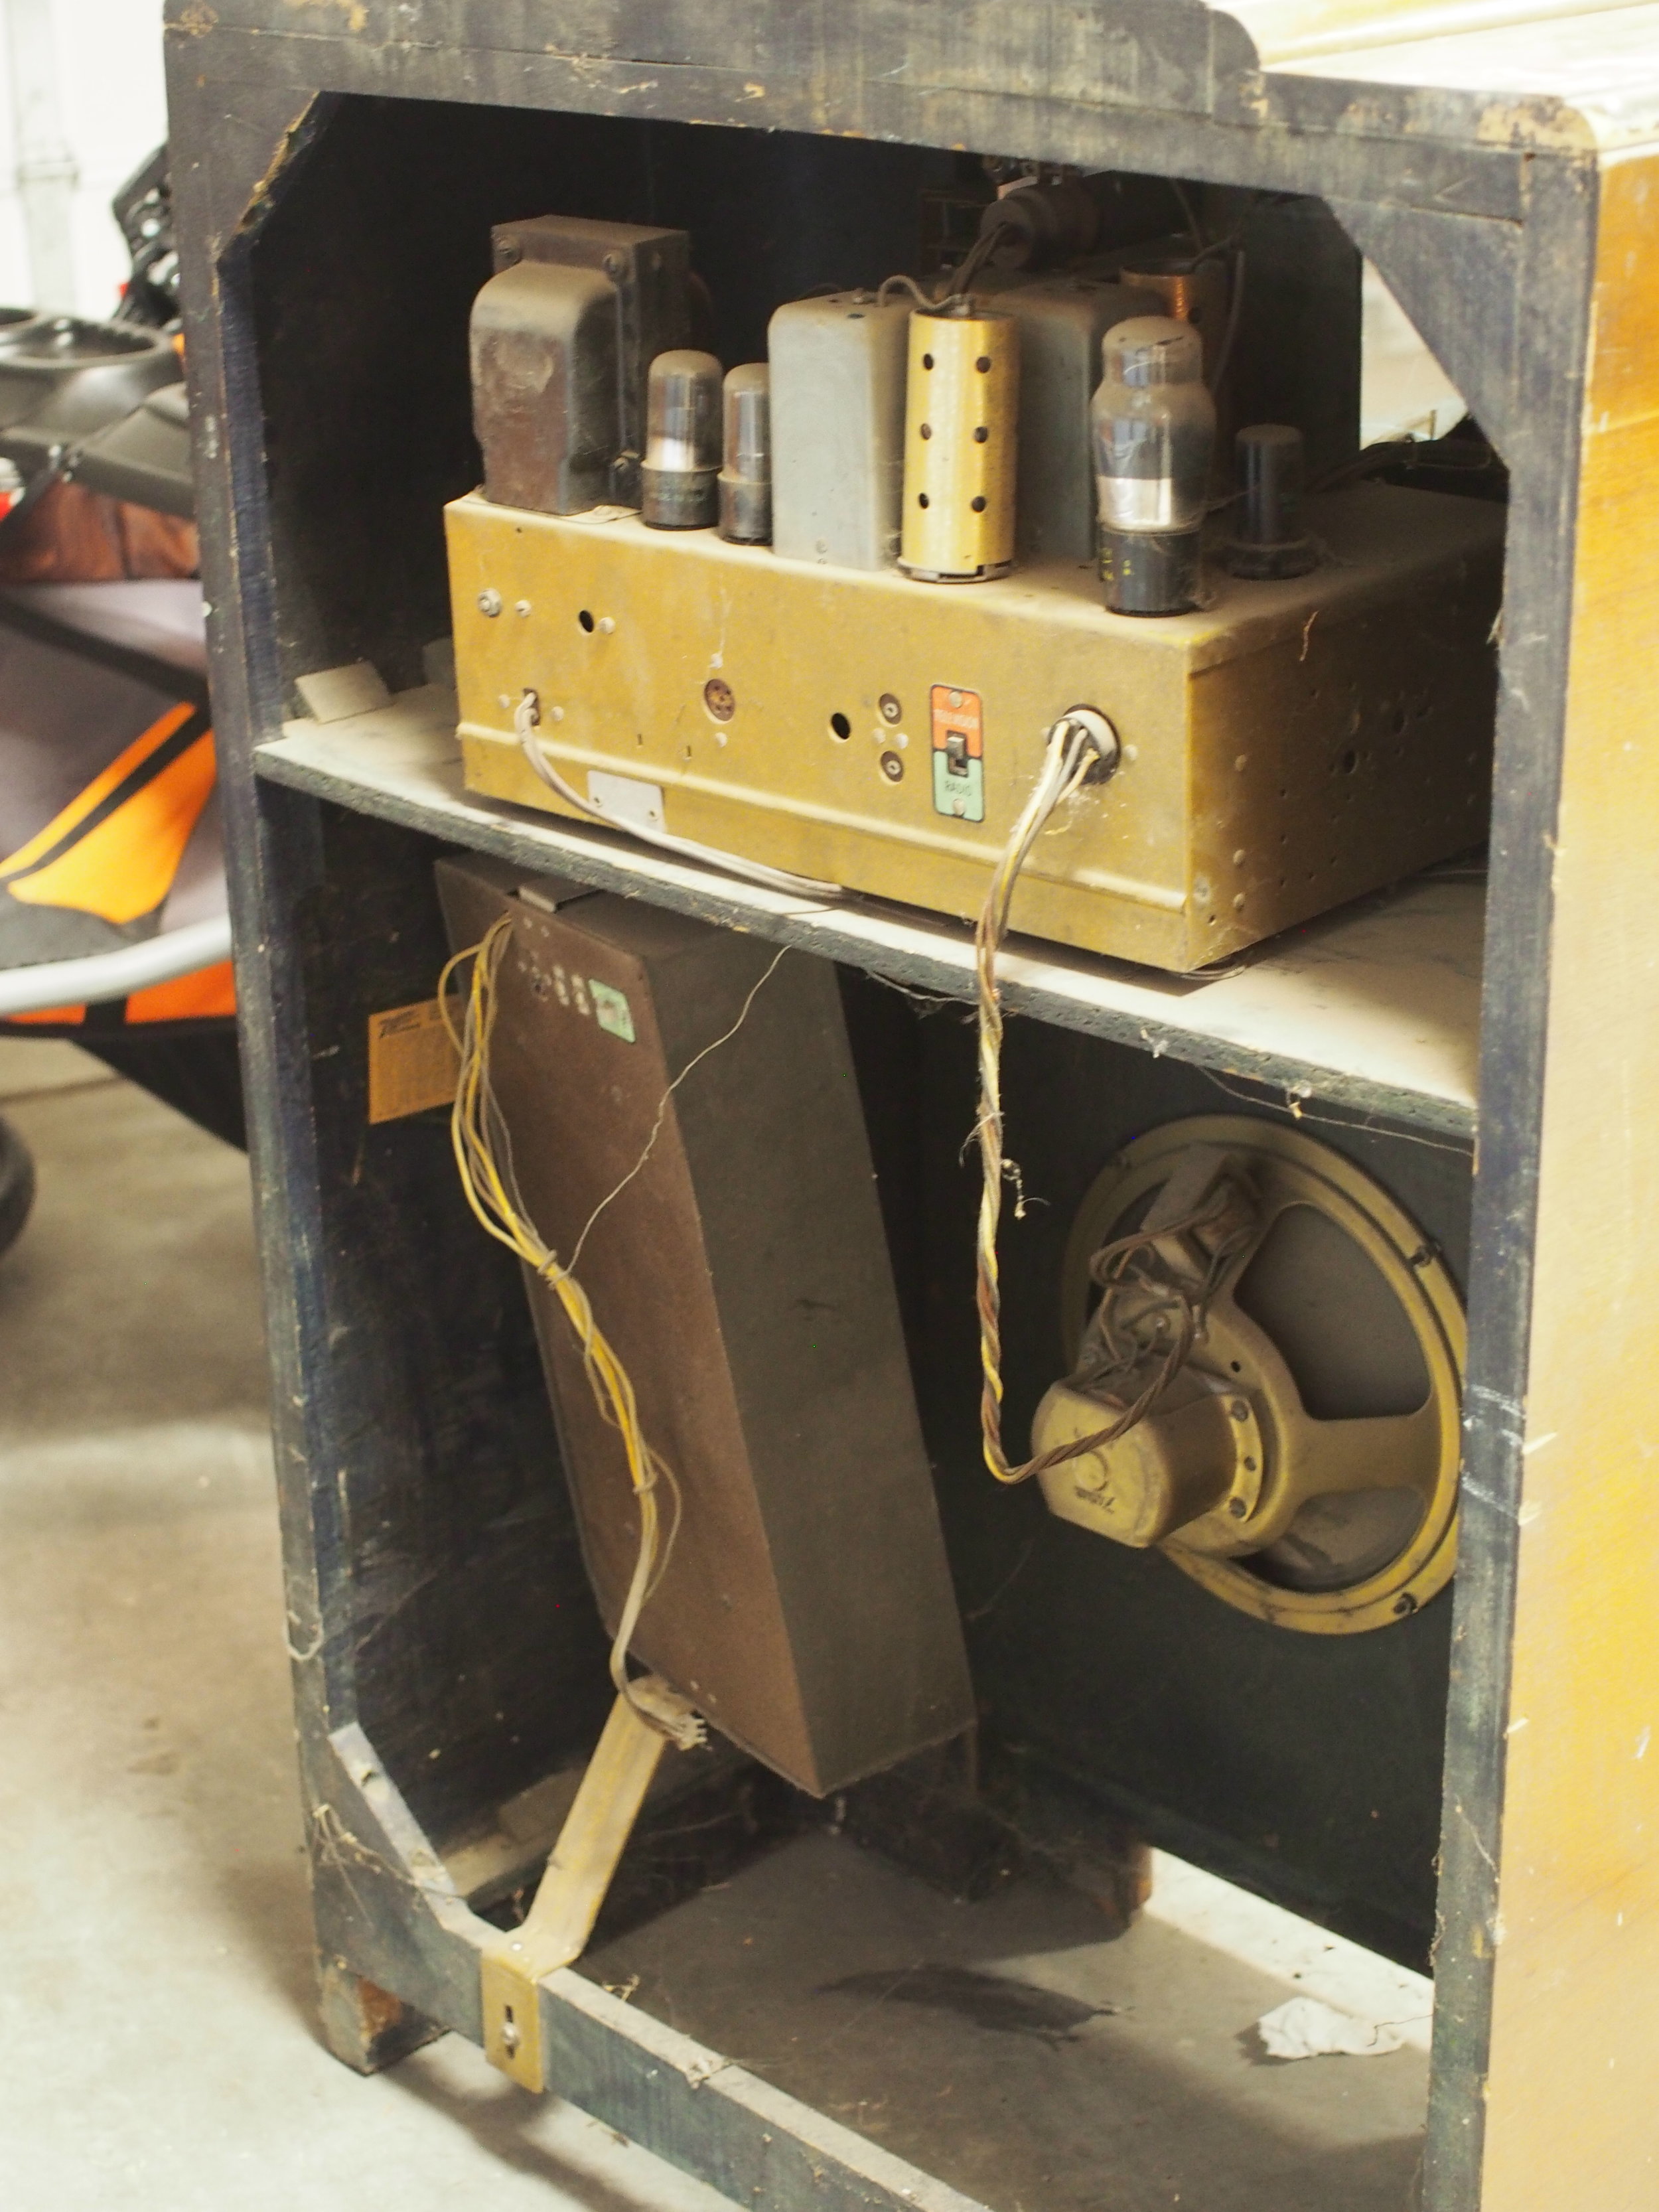
Now that I had it home, I could look into what I had found. This turns out to be a Zenith 1005 cabinet, with model number 10-S-464. I wasn't interested in the radio itself, as my electrical skills in this area are rusty and out-of-date, so I didn't think I could try to make the radio parts work, or replace them if they were broken, so I sold the radio parts, with all their vintage vacuum tubes, for $49. I broke even!
The Plan
In good shape, a 10-S-464 looks like this:
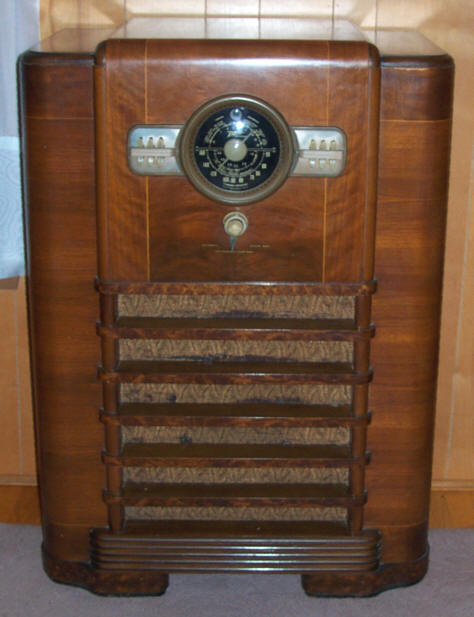
Zenith 1005 Chassis, Model 10-S-464
We decided to make a door out of the front, differing from the example my wife found, which had to to be turned around on casters everytime you wanted to get inside it. My wife would handle the refinishing of the cabinet. I volunteered to light the inside, using one of the new spiffy microcontrollers that is so cheap these days. I figured I could find a way to integrate that with the dials and buttons on the front somehow.
Up next: Disassembly
Comments ()